Overview GitHub Platform
Now that your GitHub account is ready and you already understand the difference between Git and GitHub, the smartest next step is to explore GitHub like a real developer. GitHub is a big platform, and if you try to learn every feature in isolation, it can feel confusing. A faster and more practical approach is to take a guided tour of a real, well-maintained repository and understand what you are looking at. Once you can confidently read a repository page, open files, scan documentation, and recognize the core collaboration tools, GitHub stops feeling “big” and starts feeling familiar.
To make this tour meaningful, we’ll use a high-quality example: the official Visual Studio Code repository on GitHub (github.com/microsoft/vscode). This repo is large, actively maintained, and follows many best practices. That makes it perfect for learning because you’ll see how professional projects organize code, documentation, and collaboration.
Landing on a repository: what you are really seeing
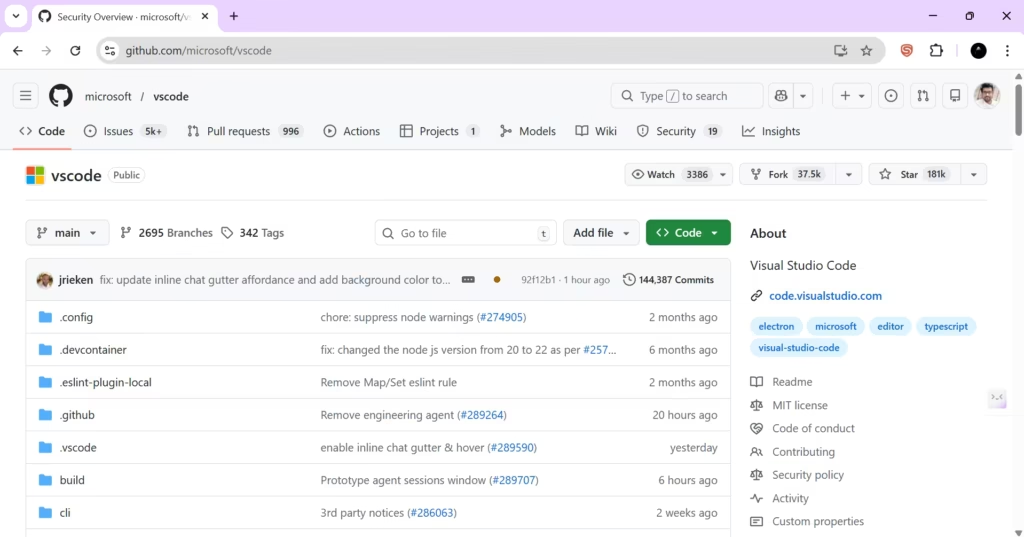
When you open any repository on GitHub, you typically land on the Code tab. This page is the project’s main dashboard. It shows the source content of the repository: folders, files, and important project information such as the current branch, recent commit activity, and repository metadata. Think of it as opening a project folder, but with extra context that a normal folder never gives you—like who changed what recently, how active the project is, and how people collaborate on it.
At the top-left area of most repositories you’ll notice the branch selector, usually showing something like main (or sometimes master in older repositories). This matters because projects can have multiple branches, and what you see on the page depends on which branch you are viewing. Professionals frequently switch branches to inspect work-in-progress changes, release branches, or hotfix branches.
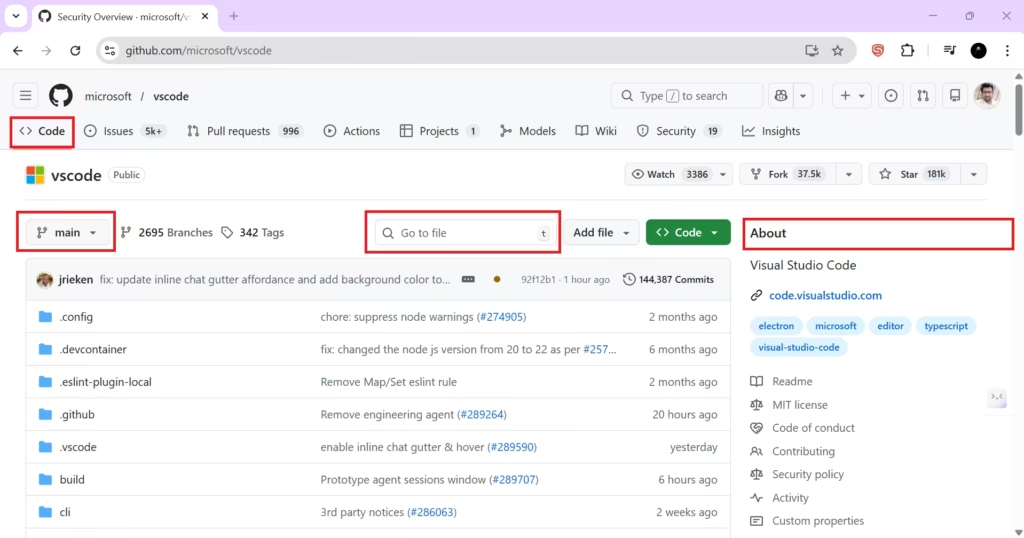
Near the file list you’ll also find search and navigation tools such as “Go to file” and repository search. These are extremely useful in large repositories where manually scrolling through folders is not practical. In projects like VS Code, there are hundreds of folders and thousands of files—search is not optional; it’s the fastest way to work.
On the right side, GitHub often shows an About section (or a sidebar). This gives you quick facts about the project: what it is, where to find official documentation, key topics/tags, and sometimes statistics like stars, watchers, and forks. For someone visiting a repository for the first time, this sidebar acts like an executive summary.
Understanding the file and folder list
The large list in the center of the Code tab is the repository’s actual content. Folders usually represent structured parts of the codebase (for example, source code, build scripts, configuration, documentation). Files include everything a project needs: code, docs, licenses, configuration for tools, and automation scripts.
A helpful habit—especially when you are exploring an unfamiliar project—is to scan the root level for “important” files. Many professional repositories include predictable files like:
README.md(project introduction and how to get started)LICENSE(how the code can be used)CONTRIBUTING.md(how to contribute)CODE_OF_CONDUCT.md(community rules)SECURITY.md(how security issues should be reported)
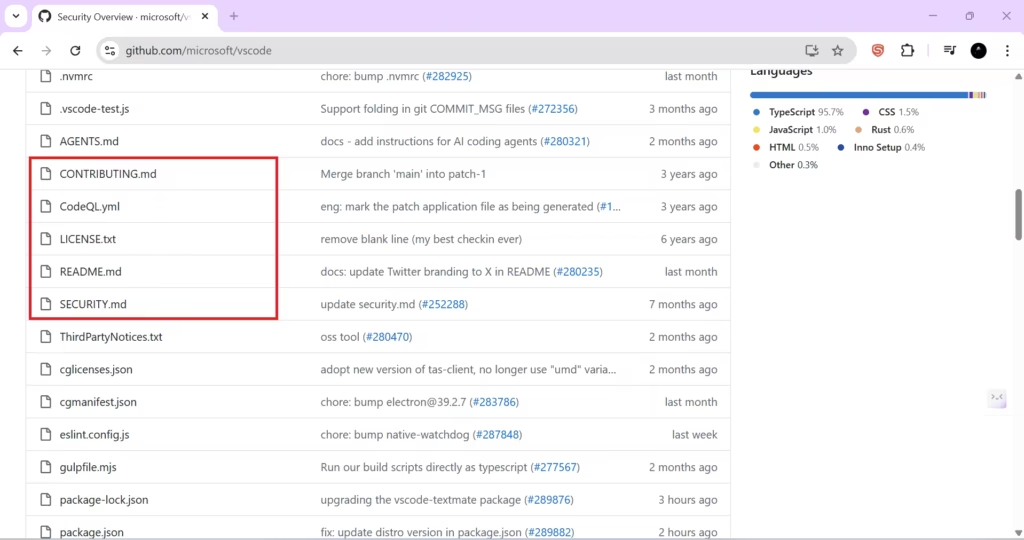
You don’t need to memorize these names. You just need to recognize the pattern: well-maintained repositories treat documentation and contribution guidelines as first-class citizens, not as an afterthought.
Opening files in the browser: reading code without cloning
One of GitHub’s most beginner-friendly strengths is that you can explore code without downloading anything. If you click a folder, GitHub navigates deeper into the project structure. If you click a file, GitHub opens it in a clean file viewer.
This viewer is not just for reading. It includes tools that help you understand history and changes. For example, you can often access file history, view differences over time, and inspect how a specific file evolved. This is extremely valuable in professional development because understanding “why something exists” often requires understanding how it changed.
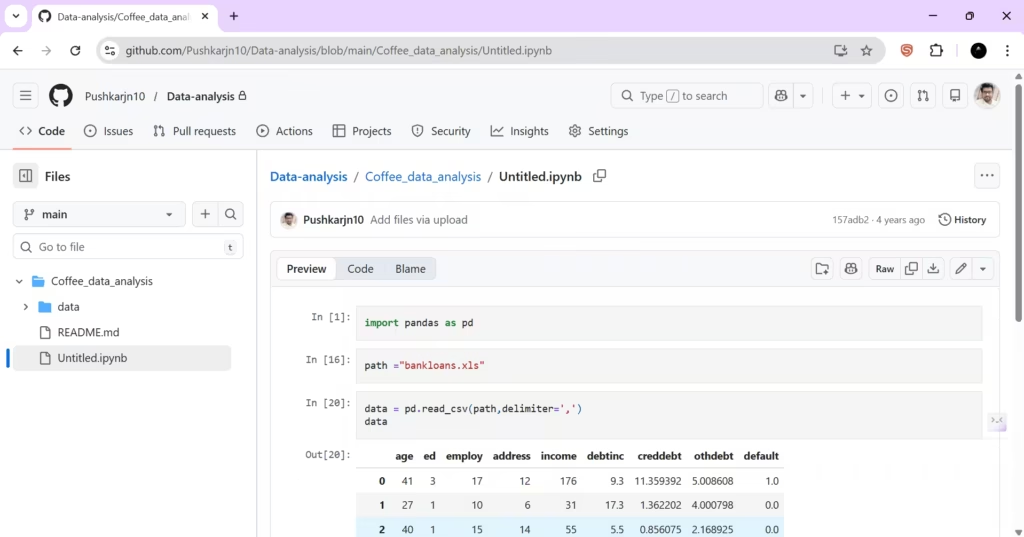
A small but powerful feature you’ll notice in file view is the ability to switch between code view and rendered view for certain file types. Markdown (.md) files, for example, can be viewed as raw text or as formatted documentation.
The README: the first file you should always read
In almost every GitHub repository, the most important first stop is the README. On GitHub, README has special behavior: the content of README.md is typically displayed prominently on the repository homepage, usually below the file list.
This is not an accident. The README is the project’s public front door. It should answer the questions a new visitor has within seconds: What is this project? Why does it exist? How do I install or run it? How do I contribute? Where can I find documentation? If you want your repository to be usable by others—or even by your future self—investing time in a strong README is one of the best returns you can get.
When you open a README file directly, you’ll usually see options like Preview and Code. Preview shows the formatted Markdown output (headings, lists, links, code blocks). Code shows the raw Markdown text. Learning to read Markdown is a major advantage on GitHub because README files, wikis, and many docs use Markdown formatting.
GitHub also allows editing certain files directly in the browser if you have permission. You may see an edit icon (commonly represented by a pencil) in the file view. This is useful when you want to quickly fix a typo in documentation or make a small update without opening your local editor. Professionals still commonly do large edits locally, but browser editing is a practical tool for fast changes.
The top navigation tabs: where GitHub’s real power lives
The Code tab shows the project content, but the real collaboration features live in the top navigation tabs. These tabs change slightly depending on the repository, but the core ones are very consistent across GitHub.
Issues: tracking bugs, tasks, and feature requests
The Issues tab is where teams organize work. Issues are used for reporting bugs, requesting new features, discussing improvements, and maintaining a structured to-do list. A professional project might have thousands of issues because it’s used as a living backlog.
When you open Issues, you’ll typically see filters for open vs closed, plus search tools. The search bar supports a very powerful query language. For example, you can filter open issues, search by labels like bug, or find issues assigned to a specific person. Even as a beginner, the value is clear: issues turn conversations into trackable work.
Pull Requests: proposing and reviewing changes
The Pull requests tab is the heart of teamwork on GitHub. A pull request (PR) is a proposal to merge changes into a repository. Instead of pushing changes straight into the main branch, you create a branch, push your work there, and open a pull request. The PR shows a clear “diff” of what changed, allows discussion on specific lines, and supports review workflows.
This is how professional teams protect code quality. Reviews catch bugs, maintain coding standards, and ensure that changes are understandable. Even when you work alone, PRs can still be valuable because they force you to document changes clearly and think in structured updates.
Actions: automation for tests and deployments
The Actions tab is GitHub’s automation engine. It allows you to run workflows automatically when something happens—like when code is pushed, when a pull request is opened, or when a release is created.
In beginner terms, Actions can automatically run checks for you. In professional terms, Actions becomes the foundation of CI/CD pipelines: tests, linting, building, packaging, security scanning, and deployments can all happen automatically. When you see Actions in a repository like VS Code, it is a sign of a mature engineering workflow.
Projects: planning work like a product team
The Projects tab offers planning tools, often in a Kanban-style format. Teams use it to organize issues and pull requests into columns such as “Todo,” “In Progress,” and “Done.”
This is where GitHub becomes valuable beyond developers. Project managers and product teams can track progress, prioritize tasks, and plan releases using the same platform where the code lives. That alignment—planning and coding connected—reduces communication gaps.
Wiki: documentation beyond the README
The Wiki tab is a documentation space for deeper project knowledge. While the README is usually a quick entry point, the Wiki can contain detailed guides, roadmaps, architecture notes, contribution instructions, and troubleshooting steps.
If you want your project to be learnable by others, a Wiki can be a strong addition. Not every repository uses it, but in large projects it often becomes a valuable knowledge base.
Security: policies, vulnerabilities, and safe reporting
The Security tab focuses on secure development and safe disclosure practices. In mature repositories, you may find security policies explaining how vulnerabilities should be reported (often privately rather than through public issues). You may also see information about known vulnerabilities in dependencies.
For beginners, the takeaway is simple: security is a real part of modern software development. For professionals, this tab is part of maintaining trust, reliability, and responsible disclosure.
Insights: activity, health, and community signals
The Insights tab gives analytics about the repository: contribution patterns, project activity, traffic, community engagement, and more. For open-source maintainers, Insights can show how people interact with the project. For teams, it can help track health and collaboration behavior.
If you’re evaluating a project to contribute to, Insights can also help you see whether it’s active and well maintained.
The “watch, star, fork” signals (and what they mean)
On most repositories you’ll see buttons like Watch, Star, and Fork. These are not just decoration.
- Star is like bookmarking a project and also signaling appreciation. Stars help others discover projects.
- Watch means you want notifications about activity such as issues and pull requests.
- Fork creates your own copy of the repository under your GitHub account, often used when contributing to open-source projects.
Understanding these signals matters because they reflect how people interact with repositories in the GitHub ecosystem.
A practical way to explore any repository like a developer
When you visit a repository you’ve never seen before, a reliable exploration pattern is:
Start by reading the README to understand purpose and usage. Then scan the root directory for documentation files like contributing guidelines and licenses. Next, open Issues to see what kinds of problems people are discussing, and open Pull Requests to see how changes are proposed and reviewed. Finally, check Actions and Insights if you want to understand how mature and active the project is.
This method works whether you are a student learning from open source, a developer evaluating a library, or a professional reviewing a dependency for production use.
By taking this “lap around GitHub,” you now know what the main tabs are, what they are used for, and how repositories are structured in real projects. In the next lessons, we’ll stop touring and start using these features step by step—so you build not just understanding, but real working skill.