Jupyter Notebook: The Fastest Python Workspace
Jupyter Notebooks are one of the most practical tools you can learn early in Python—especially if you’re doing data analysis, experimenting with code, or building small demos for learning and teaching. Instead of writing code in a terminal-only workflow, Jupyter gives you a clean, browser-based workspace where you can mix executable Python code with formatted notes, headings, bullet lists, and even math equations.
In this tutorial, you’ll learn what Jupyter Notebook is, why it’s so widely used, and how to work with notebooks efficiently—step by step.
What is Jupyter Notebook ?
Jupyter Notebook is a web application that lets you write and run Python in your browser. It’s part of the broader Project Jupyter, a nonprofit that builds open tools for interactive computing.
Notebooks are popular because they make it easy to:
- Experiment quickly (try ideas without creating a full project structure)
- Explain your work with text + code side by side
- Visualize results with plots and charts right in the same page
- Share findings with teammates or students in a single file
A notebook is saved as an .ipynb file (short for IPython Notebook). Think of it like a document that contains a sequence of runnable steps.
How Jupyter Notebook works behind the scenes
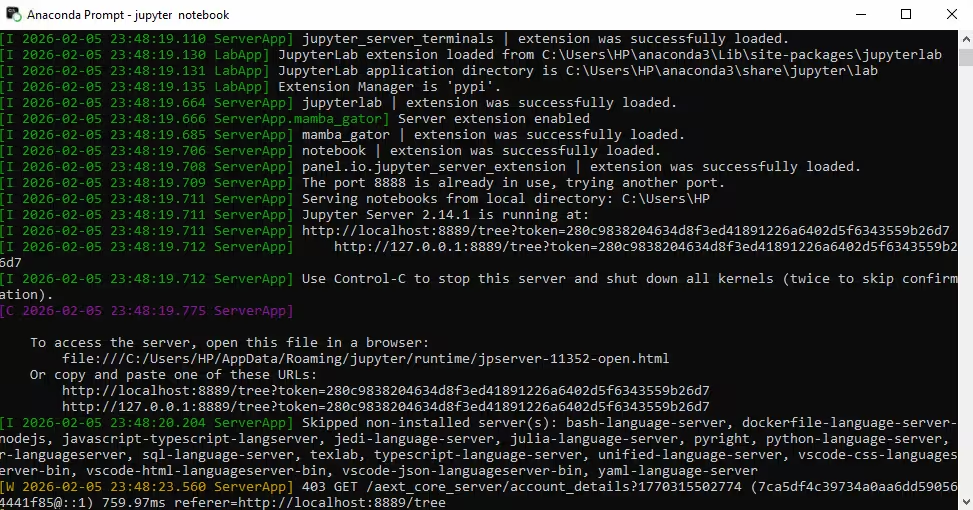
When you “start Jupyter Notebook,” you are not launching a typical desktop app. You’re actually starting a local web server on your computer. Then your browser opens a page that connects to that server.
This is why you’ll often see a local URL such as:
http://localhost:8888/...http://127.0.0.1:8888/...
Both addresses usually point to the same place (your own machine).
Step 1: Launch Jupyter Notebook
- Open your terminal (or Command Prompt / PowerShell on Windows).
- Run the command (depending on how you installed it):
jupyter notebook- or
jupyter lab(if you use JupyterLab)
- Wait a moment. Your browser should open automatically.
If the browser doesn’t open, copy the URL shown in the terminal and paste it into your browser.
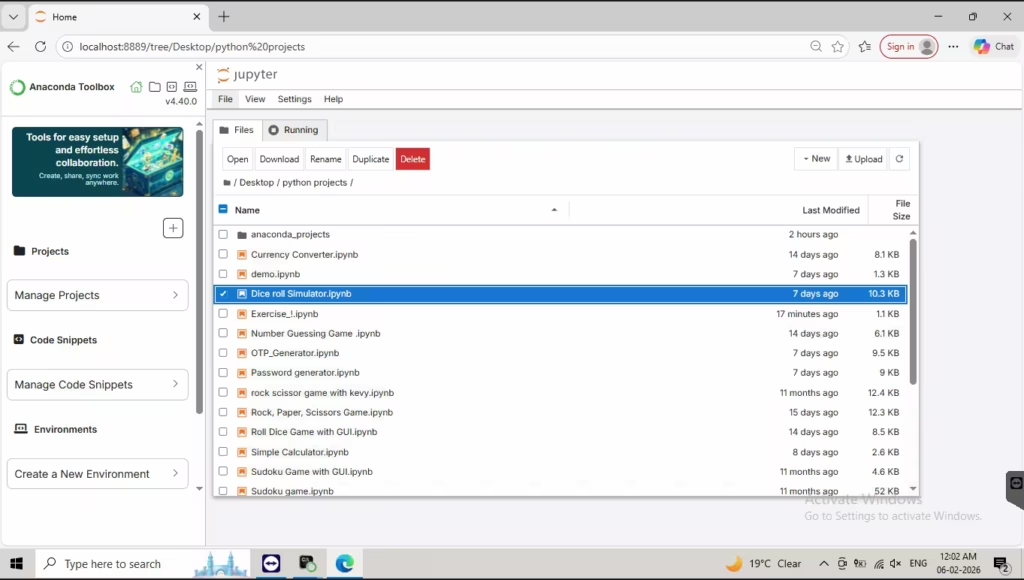
Step 2: Understand the Jupyter dashboard
When Jupyter opens in the browser, you’ll see a file list—similar to a file explorer.
Key things to notice:
- Files ending with
.ipynbare notebooks. - You can open an existing notebook by clicking it.
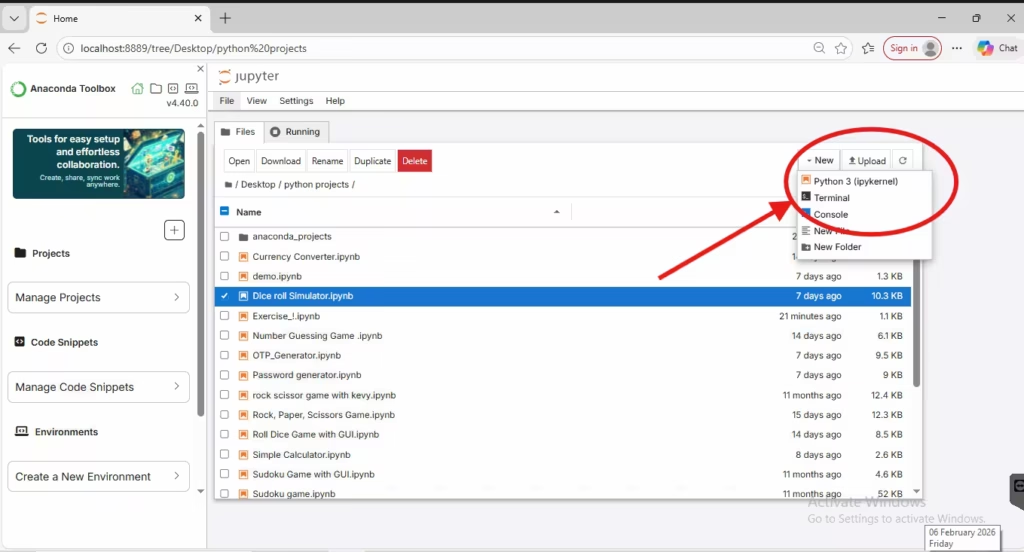
- You can create a new notebook by selecting:
- New → Python 3
Step 3: Learn the most important concept— cells
A notebook is made of cells. Each cell can be:
- Code cell: runs Python
- Markdown cell: displays formatted text (like a mini document)
This structure is why notebooks feel so productive: you can write a small piece of code, run it, see output, then move to the next piece.
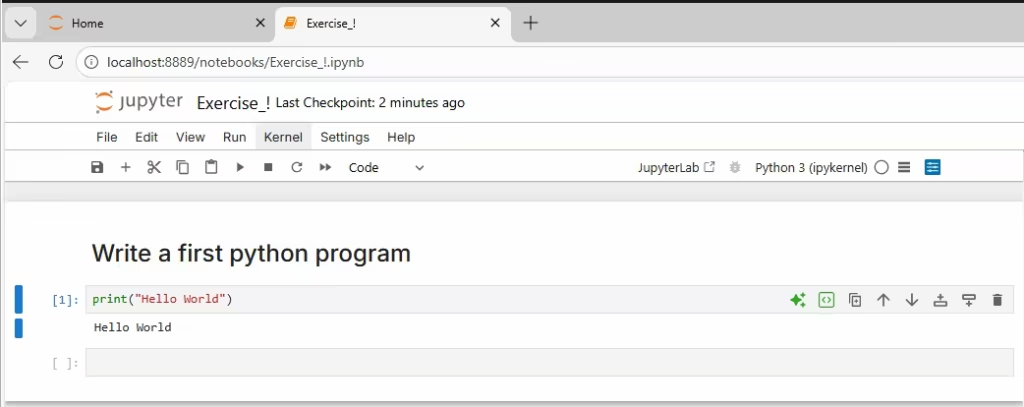
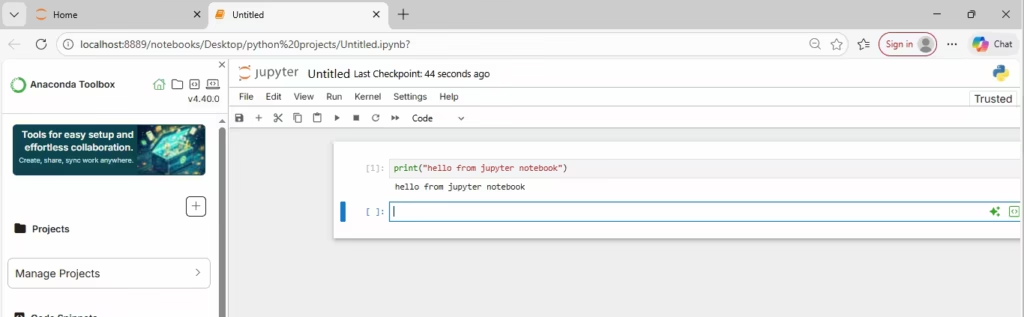
Step 4: Run Python code in a cell
- Click inside a cell.
- Type Python code like:
print("Hello from Jupyter!")
Code language: PHP (php)- Run it using:
- Shift + Enter (most important shortcut)
This executes the cell and moves you to the next cell.
Step 5: Command mode vs Edit mode
Jupyter has two main modes:
Edit mode
- You’re typing inside the cell.
- Usually shows a green (or highlighted) border.
Command mode
- You’re controlling the notebook (adding, deleting, moving cells).
- Clicking outside the cell content typically switches to command mode.
- Usually shows a blue border.
This mode system is what makes Jupyter’s keyboard shortcuts so fast.
Step 6: Create and delete cells quickly
Once you’re comfortable with Shift + Enter, the next productivity boost is simple cell management.
Add new cells
- A: insert a cell above the current cell (command mode)
- B: insert a cell below the current cell (command mode)
Create multiple new cells fast
- Press Shift + Enter repeatedly to run and advance, creating new cells as you go.
Delete cells
- In command mode, select a cell (click the left margin or the cell area so it becomes highlighted)
- Press D, D (two times)
Essential Notebook Shortcuts
Tip: You do not need to memorize everything. Start with Shift + Enter and learn the rest as you need them.
| Action | Shortcut (Command Mode unless noted) |
|---|---|
| Run cell | Shift + Enter (Edit mode or Command mode) |
| Insert cell above | A |
| Insert cell below | B |
| Delete cell | D, D |
| Convert cell to Markdown | M |
| Convert cell to Code | Y |
Step 7: Write notes using Markdown
Not everything in a notebook should be code. Use Markdown cells for headings, explanations, and documentation.
Convert a cell to Markdown
- Click outside the cell (command mode).
- Press M.
(You can also use the menu: Cell → Cell Type → Markdown.)
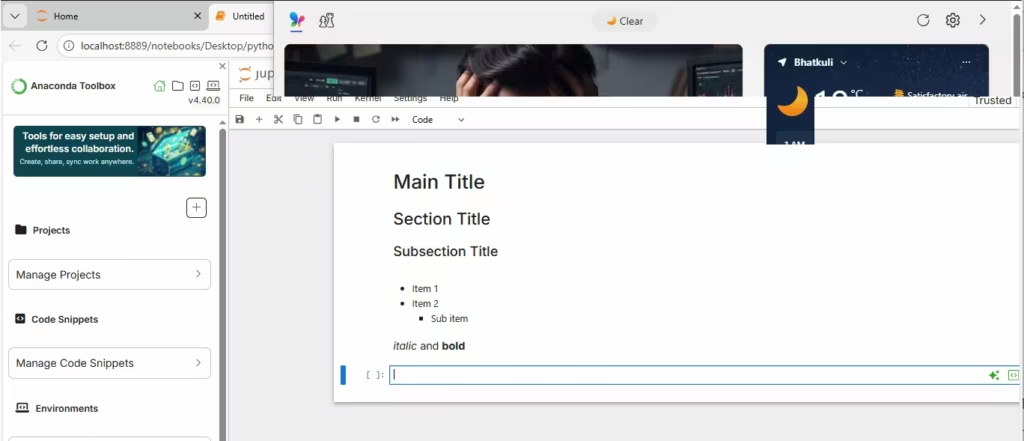
Common Markdown examples
Headings
# Main Title
## Section Title
### Subsection Title
Code language: PHP (php)
Bullet points
- Item 1
- Item 2
  - Sub item
Emphasis
*italic* and **bold**
Run a Markdown cell with Shift + Enter to render it.
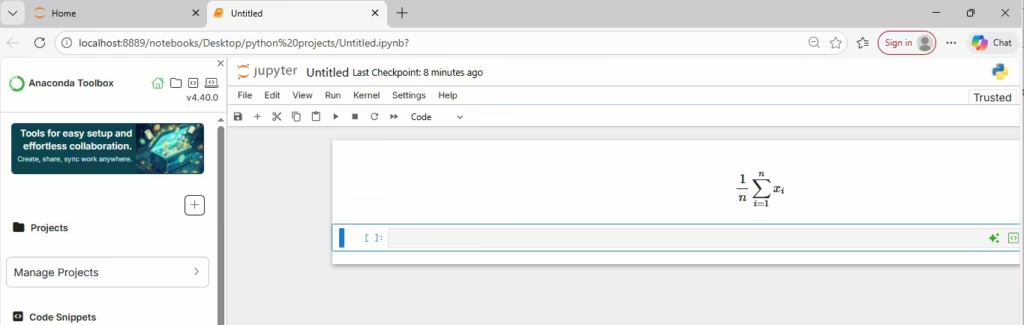
Step 8: Add math equations (LaTeX)
Jupyter supports math formatting using LaTeX-style syntax. This is extremely helpful for:
- data science explanations
- machine learning formulas
- statistics notes
A common approach:
- Inline:
$a^2 + b^2 = c^2$ - Block equation:
$$
\frac{1}{n}\sum_{i=1}^{n} x_i
$$
Step 9: Export or share notebooks
Notebooks are designed to be shareable. From the notebook interface, you can export into formats such as:
- HTML
- PDF (setup may be needed)
- Markdown
- Python script
This is useful when you want to:
- send a report to someone
- publish content
- archive results
Step 10: Viewing notebooks on GitHub (and editing in VS Code)
GitHub displays notebooks nicely
One reason notebooks became so widely used is that platforms like GitHub can render .ipynb files in a readable way—code, outputs, and markdown all display cleanly.
Edit notebooks in Visual Studio Code
If you prefer working inside an IDE, Visual Studio Code can open and run notebooks too (with the right extensions installed). This can be a great alternative if:
- you prefer VS Code’s editor features
- you have trouble running notebooks in the browser
- you want notebooks alongside a larger project
A practical workflow for beginners
If you’re just starting, here’s a simple progression that works well:
- Learn to start Jupyter and open a notebook.
- Get comfortable with Shift + Enter.
- Use Markdown cells to explain what your code is doing.
- Add shortcuts slowly (A, B, D D, M) as they become useful.
Over time, you’ll naturally become fast at notebook-based work without trying to memorize everything at once.
Summary
Jupyter Notebooks are a powerful learning and productivity tool because they combine:
- a quick Python execution environment
- clear documentation with Markdown
- built-in support for charts, outputs, and math
- easy sharing through
.ipynbfiles, exports, and GitHub rendering
If you can do just one thing confidently today, make it this:
Write a cell → Press Shift + Enter → Observe the output → Repeat.
That single habit will carry you a long way in Python learning, data science, and professional experimentation.