Windows Terminal for Git: How to Install, Set Up, and Use a Modern Command-Line Environment on Windows
When you start using Git seriously, the command line becomes part of your daily workflow. Even if you prefer a graphical tool, you’ll still end up opening a terminal to clone repositories, create branches, resolve merge conflicts, run build scripts, or check status quickly. On Windows, you can use Command Prompt or PowerShell, but Windows Terminal gives you a far better developer experience. It’s a modern terminal application for Windows 10 and Windows 11 that is faster, cleaner, and more flexible than the legacy consoles. The biggest advantage for Git learners and professionals is that Windows Terminal can host multiple shells in one place—PowerShell, Command Prompt, and even Linux shells through WSL—so you can stay in the same window while switching between environments depending on your project.
A feature you’ll appreciate immediately is tabs. Instead of opening separate windows for different tasks, you can keep one tab for your main repository, another for running tests or a dev server, and a third for quick commands like checking logs or reading a file. This becomes a real productivity boost not only for developers, but also for DevOps engineers and anyone dealing with automation scripts. Windows Terminal is also customizable, so you can make the command line comfortable for long working sessions—fonts, colors, keybindings, and profiles can be adjusted to match your workflow. If you use WSL for development, Windows Terminal can display your Linux distributions as profiles too, making it easy to jump between Windows and Linux command-line environments while using Git.
Step-by-step: Install and set up Windows Terminal
Step 1: Confirm your Windows version
Make sure you’re on Windows 10 or Windows 11, because Windows Terminal is officially available and works best on these versions.
Step 2: Open Microsoft Store
Click the Start menu, type Microsoft Store, and open it.
Step 3: Search for Windows Terminal
In the Store search bar, type Windows Terminal. You’ll usually see two options: Windows Terminal (Stable) and Windows Terminal Preview.
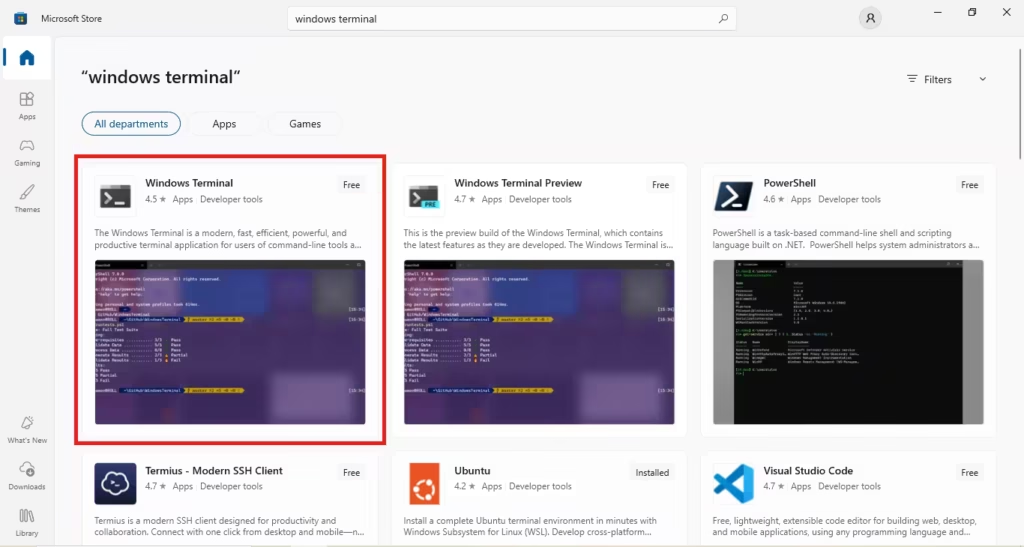
Step 4: Choose Stable vs Preview
For most beginners and working professionals, choose Stable because it’s reliable and widely tested. Choose Preview only if you want early access to new features and don’t mind occasional changes.
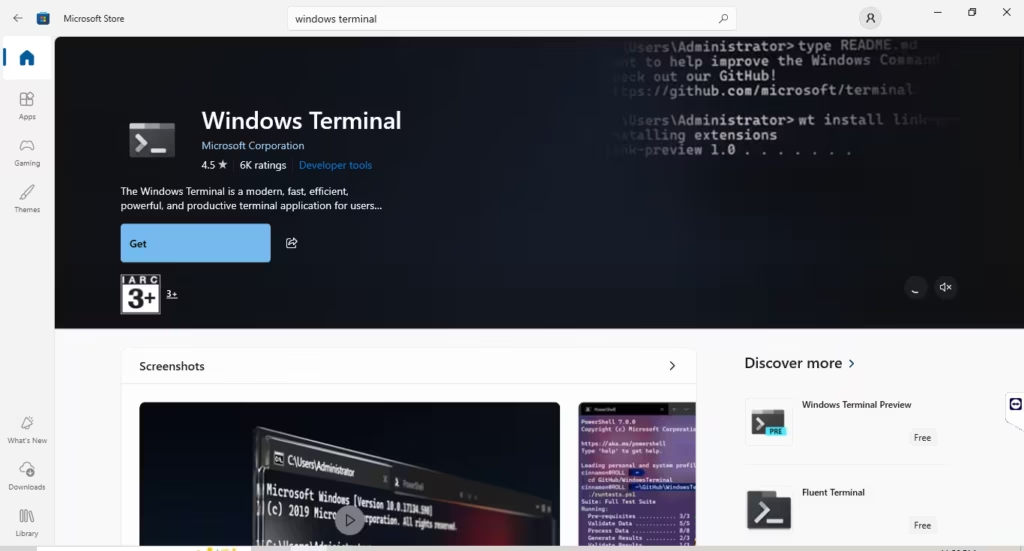
Step 5: Install Windows Terminal
Click Get / Install. After installation, click Open.
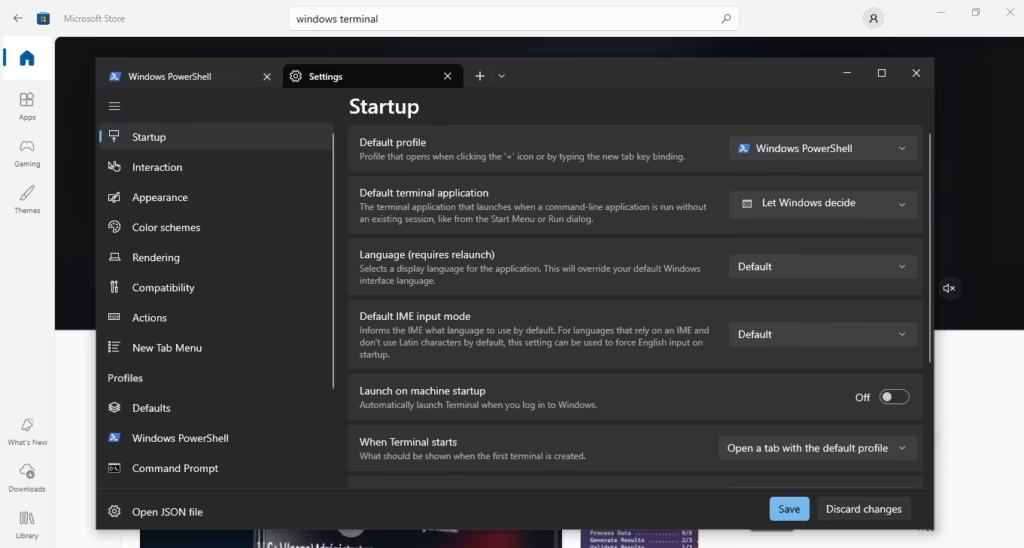
Step 6: Set your default profile (PowerShell or WSL)
Inside Windows Terminal, open Settings (often a gear icon or menu on the top bar). Under Startup / Default profile, select what you want to open by default:
- PowerShell (recommended for most Windows Git work)
- WSL (recommended if you do development in Linux)
Step 7: Use tabs for a faster Git workflow
Open multiple tabs for different tasks—one for your repository, one for running scripts/tests, and another for quick commands. This keeps your Git workflow organized without opening multiple windows.
Step 8 (Optional): Make your terminal more developer-friendly with Oh My Posh
If you want a cleaner and more informative prompt, install Oh My Posh (available through the Microsoft Store or other package managers). After installing, restart Windows Terminal to see the theme changes. Many themes can show useful context like your current folder and Git branch, which helps you work faster.
Once these steps are done, you’re ready to use Windows Terminal as your main command-line tool for Git in the next sections of this chapter.