Introduction
In this tutorial, we will build a Rolling Dice Game with GUI using Python’s Pygame library. This interactive game allows players to roll a dice, earn points, and progress through multiple levels. With engaging gameplay mechanics, score tracking, and bonus rewards, this project is a great way to explore GUI development and game logic in Python.
Table of Contents
By the end of this tutorial, you will have a fully functional Dice Rolling Game with the following features:
- Interactive GUI using Pygame
- Score and level progression system
- Bonus tokens for extra points
- Start, Restart, and Quit buttons
- Multi-level difficulty progression
- Interactive visual elements
- A well-structured game loop for efficiency
What is the Rolling Dice Game?
The Rolling Dice Game is an engaging game where players roll a dice to accumulate points and advance through levels. The primary objective is to achieve the target score without exceeding it. Players can earn bonus tokens by rolling a six, which can be used to gain extra points. As players progress, the target score increases, making the game more challenging and exciting.
The game is designed to be easy to learn but provides increasing difficulty, keeping players engaged. It is a perfect beginner-friendly project to understand how graphical applications work in Python.
How to Play the Rolling Dice Game & Its Rules
Start the Game
Click on the “Start Game” button to begin playing. The game screen initializes, and you are ready to roll the dice.
Rolling the Dice
Click on the “Roll Dice” button to generate a random number between 1 and 6. The result is displayed on the screen, and the rolled number is added to the score.
Scoring
- The number rolled is added to your current score.
- Rolling a six grants a bonus token.
- If the rolled number exceeds the target, the game ends, and you must restart.
Using Bonus Tokens
- If you have bonus tokens, you can use them to add 5 extra points to your score.
- Bonus tokens provide a strategic advantage to help you reach the target score more effectively.
Winning & Losing
- Reach the target score exactly to complete the level.
- If your score exceeds the target, the game ends.
- Bonus tokens cannot be used after exceeding the score limit.
Advancing to the Next Level
- Upon reaching the target score, you can proceed to the next level with an increased difficulty.
- Each level raises the target score, making it progressively harder.
Restarting the Game
- If you lose, you can restart the game from the main menu.
- The game loop resets, and you start fresh from level one.
How This Game Helps Improve Your Python Skills
This project enhances your Python programming skills by incorporating several fundamental concepts:
GUI Development
Learn how to create an interactive Graphical User Interface (GUI) using Pygame. GUI programming allows users to interact visually with applications, which is essential in game development.
Event Handling
Understand how to manage user interactions, such as mouse clicks, button presses, and state changes to dynamically control the game.
Game Logic & State Management
Implement different game states, including “menu,” “playing,” “level complete,” and “game over.” Handling these states efficiently ensures a seamless user experience.
Randomization
Utilize the random module to generate dice rolls, making the game unpredictable and exciting. Randomization is an essential concept in game development and simulations.
Functions & Modular Code
Organize the code into functions to improve readability, reusability, and maintainability. Modular programming makes it easier to expand the project and add new features.
Loops & Conditionals
Use loops and conditional statements to control game flow and logic efficiently. These fundamental programming structures help in managing game execution dynamically.
Understanding Pygame Basics
By working on this project, you gain experience with Pygame basics, such as rendering graphics, handling user input, and maintaining a structured game loop.
Prerequisites
Before diving into the implementation, ensure you have Python and Pygame installed. You can install Pygame using the following command:
pip install pygame
Project Setup
We will create a simple Pygame-based GUI where users can roll a dice, earn points, and progress through different levels. This project will cover structured coding practices for better maintainability.
Step 1: Importing Required Libraries
import pygame
import sys
import random
Code language: JavaScript (javascript)
Here, we import pygame for GUI development, sys for system exit, and random for dice rolling.
Step 2: Initializing Pygame and Setting Up the Window
pygame.init()
WIDTH, HEIGHT = 600, 400
screen = pygame.display.set_mode((WIDTH, HEIGHT))
pygame.display.set_caption("Dice Rolling Game")
Code language: JavaScript (javascript)
This sets up the game window with a title and specified dimensions.
Step 3: Defining Colors, Fonts, and Buttons
WHITE = (255, 255, 255)
BLACK = (0, 0, 0)
GRAY = (200, 200, 200)
BLUE = (50, 50, 255)
GREEN = (0, 200, 0)
RED = (200, 0, 0)

font = pygame.font.SysFont(None, 36)
small_font = pygame.font.SysFont(None, 24)
These color values and fonts are used to style the game elements and provide better visual appeal.
start_button_rect = pygame.Rect(250, 150, 100, 50)
roll_button_rect = pygame.Rect(400, 150, 150, 50)
bonus_button_rect = pygame.Rect(400, 220, 150, 50)
next_level_button_rect = pygame.Rect(250, 200, 100, 50)
restart_button_rect = pygame.Rect(250, 200, 100, 50)
quit_button_rect = pygame.Rect(WIDTH - 110, 10, 100, 40)
These define the button positions and dimensions for user interactions, ensuring a structured and organized layout.
Step 4: Game Logic
level = 1
score = 0
target = 20 + level * 10  # Target score increases with level
bonus_tokens = 0
state = "menu"  # Game states: "menu", "playing", "level_complete", "game_over"
last_dice = None
Code language: PHP (php)- The target score increases as the player progresses through levels.
- Bonus tokens are awarded when the player rolls a six.
- The game state determines the current screen displayed to the user.
- Future expansions could include animations for dice rolling and an improved scoring system.
Step 5: Utility Functions for GUI Elements
Drawing Text
def draw_text(text, font, color, surface, x, y):
    textobj = font.render(text, True, color)
    surface.blit(textobj, (x, y))
Code language: PHP (php)
Drawing Buttons
def draw_button(surface, rect, text, font, bg_color):
    pygame.draw.rect(surface, bg_color, rect)
    text_surface = font.render(text, True, BLACK)
    text_rect = text_surface.get_rect(center=rect.center)
    surface.blit(text_surface, text_rect)
Code language: PHP (php)
These functions help render text and buttons on the game screen.
Step 6: Handling Game States
Resetting the Game
def reset_game():
    global level, score, target, bonus_tokens, state, last_dice
    level = 1
    score = 0
    target = 20 + level * 10
    bonus_tokens = 0
    last_dice = None
    state = "playing"
Code language: PHP (php)
Setting Up a New Level
def new_level():
    global level, score, target, bonus_tokens, state, last_dice
    level += 1
    score = 0
    target = 20 + level * 10
    bonus_tokens = 0
    last_dice = None
    state = "playing"
Code language: PHP (php)
These functions help in restarting the game and progressing to the next level.
Step 7: Main Game Loop
clock = pygame.time.Clock()
running = True

while running:
    screen.fill(WHITE)
    for event in pygame.event.get():
        if event.type == pygame.QUIT:
            running = False

        if event.type == pygame.MOUSEBUTTONDOWN and event.button == 1:
            mouse_pos = pygame.mouse.get_pos()
            if quit_button_rect.collidepoint(mouse_pos):
                running = False
                continue
            if state == "menu":
                if start_button_rect.collidepoint(mouse_pos):
                    reset_game()
            elif state == "playing":
                if roll_button_rect.collidepoint(mouse_pos):
                    dice = random.randint(1, 6)
                    last_dice = dice
                    score += dice
                    if dice == 6:
                        bonus_tokens += 1
                    if score == target:
                        state = "level_complete"
                    elif score > target:
                        state = "game_over"
                elif bonus_button_rect.collidepoint(mouse_pos):
                    if bonus_tokens > 0:
                        bonus_tokens -= 1
                        score += 5
                        if score == target:
                            state = "level_complete"
                        elif score > target:
                            state = "game_over"
            elif state == "level_complete":
                if next_level_button_rect.collidepoint(mouse_pos):
                    new_level()
            elif state == "game_over":
                if restart_button_rect.collidepoint(mouse_pos):
                    state = "menu"
Code language: PHP (php)
This loop handles game logic, events, and user interactions.
Step 8: Drawing Different Screens
The game interface changes based on the state:
if state == "menu":
draw_text("Dice Rolling Game", font, BLUE, screen, 170, 50)
draw_button(screen, start_button_rect, "Start Game", small_font, GREEN)
elif state == "playing":
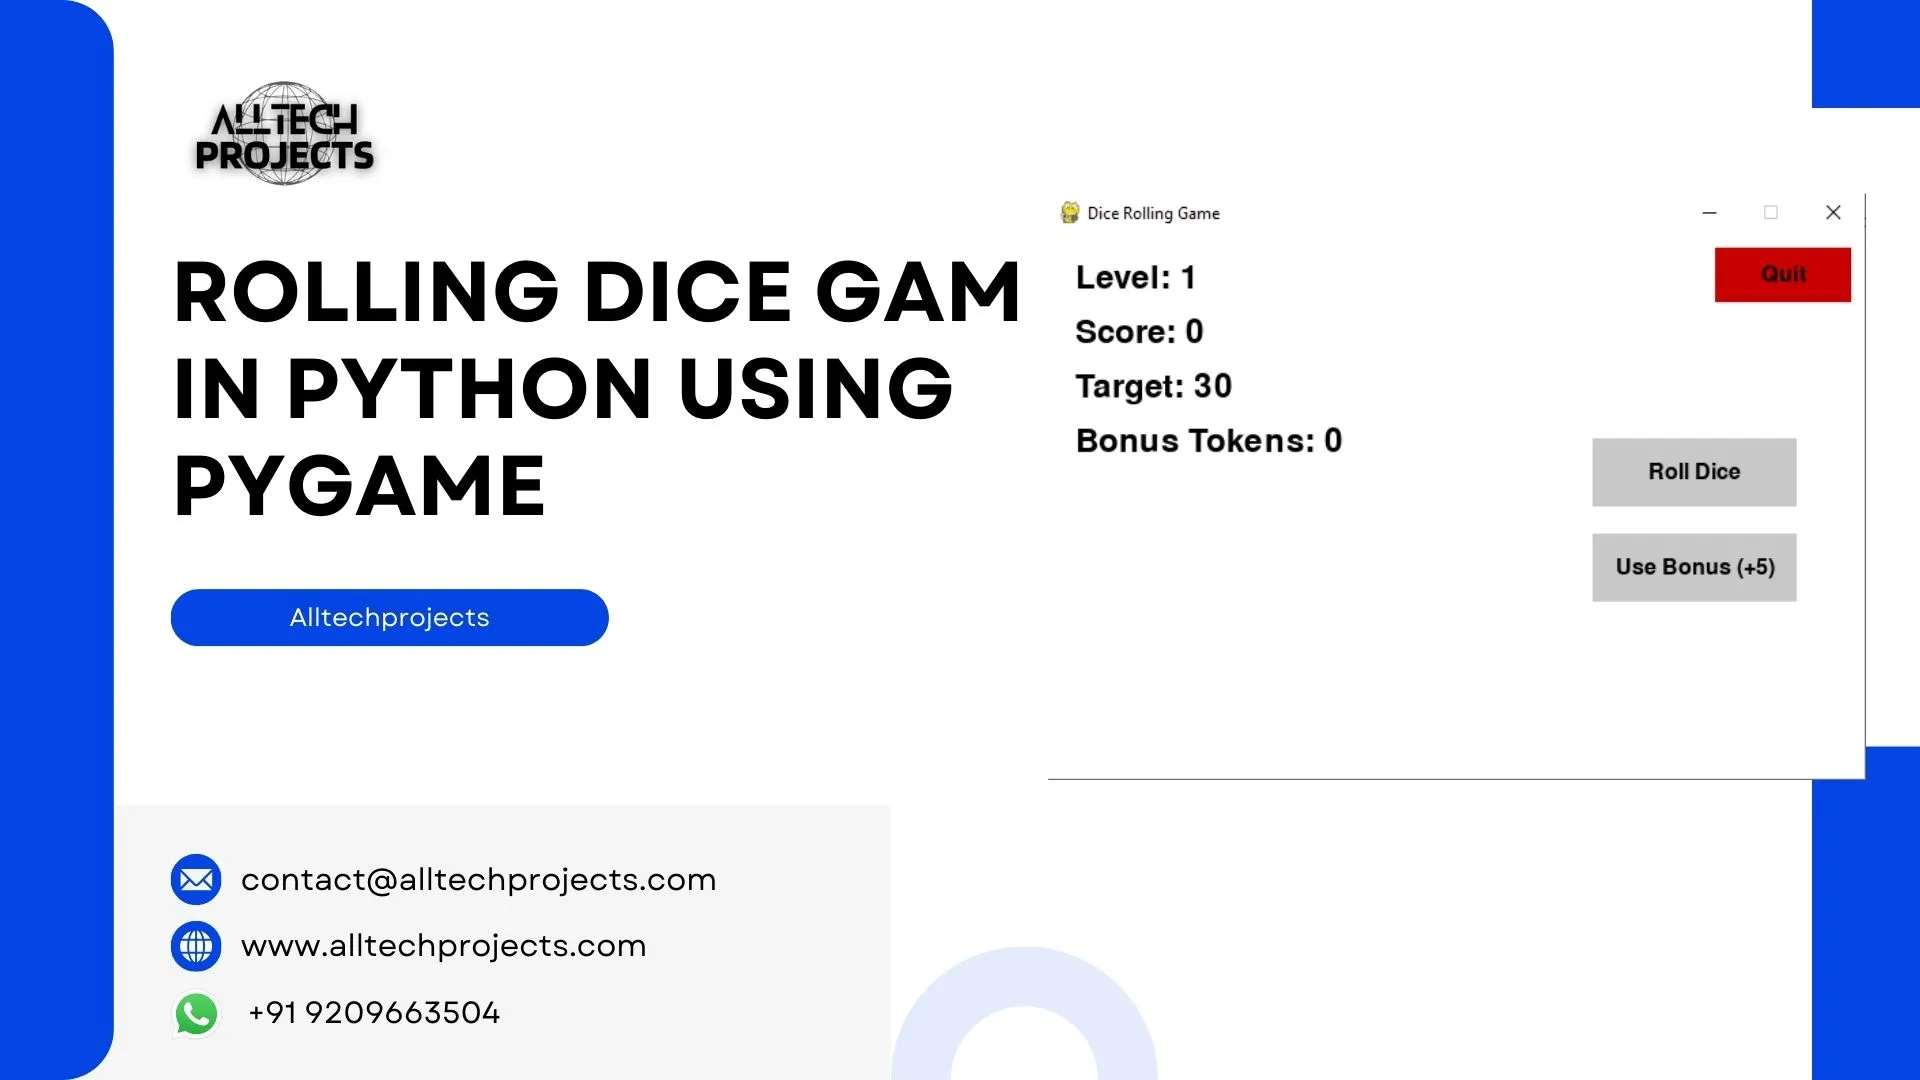
draw_text(f"Level: {level}", font, BLACK, screen, 20, 20)
draw_text(f"Score: {score}", font, BLACK, screen, 20, 60)
draw_text(f"Target: {target}", font, BLACK, screen, 20, 100)
draw_text(f"Bonus Tokens: {bonus_tokens}", font, BLACK, screen, 20, 140)
if last_dice is not None:
draw_text(f"Last Dice: {last_dice}", font, BLACK, screen, 20, 180)
draw_button(screen, roll_button_rect, "Roll Dice", small_font, GRAY)
draw_button(screen, bonus_button_rect, "Use Bonus (+5)", small_font, GRAY)
elif state == "level_complete":
draw_text("Level Complete!", font, GREEN, screen, 200, 50)
draw_text(f"You reached {target} points.", font, BLACK, screen, 150, 100)
draw_button(screen, next_level_button_rect, "Next Level", small_font, GREEN)
elif state == "game_over":
draw_text("Game Over!", font, RED, screen, 220, 50)
draw_text(f"You exceeded {target} points.", font, BLACK, screen, 150, 100)
draw_button(screen, restart_button_rect, "Restart", small_font, GREEN)
# Draw the Quit button on every screen
draw_button(screen, quit_button_rect, "Quit", small_font, RED)
pygame.display.flip()
clock.tick(30)
Code language: PHP (php)Each state has different buttons and displays accordingly.
Step 9: Quitting the Game
pygame.quit()
sys.exit()
Code language: CSS (css)
This ensures the game runs smoothly.
With this project, you can now experiment with further enhancements, such as adding sound effects, leaderboard tracking, and different dice types. This will help in mastering Python and game development concepts further.
Congratulations! You have successfully built a Rolling Dice Game with GUI in Python using Pygame. This project enhances your understanding of event handling, UI design, and game logic in Python. Try adding more features like animations or sound effects to make it even more engaging!